Table of content |
|---|
1.Access & Description
The Seelow is an intelligent wireless laser sensor that was conceived to monitor the inventory of your Silo in a simple and efficient way. A Seelow runs on solar energy and it is equipped with a patented mechanism to protect against dust which helps to keep the laser reader clean and in good condition
Accessing the Seelow Page
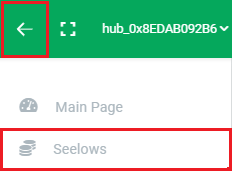
Log onto your Agrimesh console, from the hamburger menu to the far left of the green ribbon, select the « Seelows » option. A selection of your Seelows will be displayed. Click on the one you wish to see the details for. Let’s see what kind of information there is on this page.
Details
In the upper section is the present information about the Seelow. Starting from the left, the image gives a visual approximation of the amount of feed in the bin. Moving to the right, above the Seelow name, the blue cog lets you configure or modify your Seelow. Underneath the name (in the red rectangle), we have some technical information.
- The hexadecimal number starting with 0x is the device serial number.
- The little clock increments once every second. It represents the last time a signal was sent to the Hub. Although the timer should stay under two minutes, going past is usually not a big deal since the feed in the bin moves fairly slowly.
- Next is the quality of the last signal sent from the Seelow to the Hub, in decibels. A perfect signal is -40 db. The worst signals we observe are around -90 db. Going below -80 db may be problematic if you see the previously described timer go over 3 or 4 minutes frequently. In this case, you can review your installation or contact our support.
- Then we have the battery voltage. This one should usually stay over 4.10V as it will recharge with solar power. A battery below 3.50V is not expected to work anymore.
- Finally, the downward and upward arrows represent the last maximum and minimum measurements taken, respectively. This one is a little technical: before sending the measured distance to the Hub, the laser takes a series of measurements and the minimum and maximum are recorded and displayed there. These values should be fairly close to each other.
The refresh button will trigger the door on the Seelow to open and refresh the measurements.
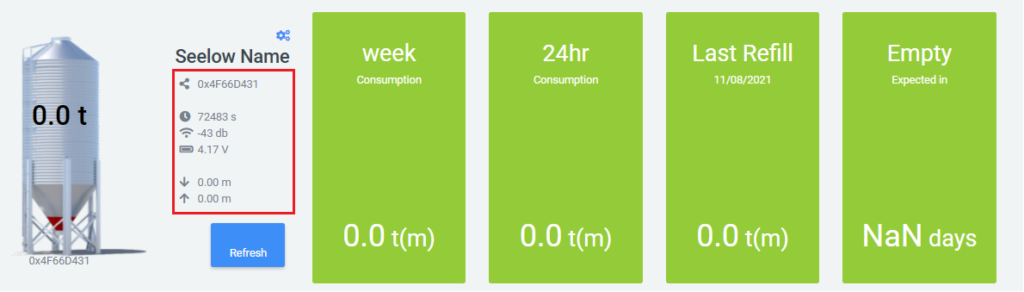
The information in the green rectangles is more straightforward. From left to right, we have
- the weekly consumption,
- the consumption in the last 24 hours,
- the date and the amount of the last refill,
- and the number of days before the bin is expected to be empty.
Below are charts for consumption per day, the consumption in the last 24 hours, then the weekly and monthly consumption. Last is the detailed information for the last month. CSV files are available for all your charts.
2. Installation
Before installing your Seelow
It is usually a good idea to configure the Seelow properly before installing it on the bin. If something goes wrong, it is then possible to contact our support and have the Seelow in hands without having to climb back up on the bin. Either way, this guide will provide all the information you need to get started with your Seelow.
If you would like to configure the Seelow before mounting it on the bin, make sure you have already created your account and added a Hub to your allowance list.
Turning on the Seelow
The first step is to turn on the Seelow by pressing and holding the button until the light on it turns on solid green. The light will then starts to flash once every five seconds, meaning it is looking for a Hub to connect to. Once it has found one, it will automatically synchronize with it and flash twice every five seconds. Although it should take less than two minutes for the Seelow to synchronize with the Hub, it will take more time if one is far away from the other.
| Light signal | Meaning |
|---|---|
| Light turned off | Seelow is turned off |
| Light is solid | Seelow is booting up |
| Light flashes once every five seconds | Seelow is looking for a Hub to connect to |
| Light flashes twice every five seconds | Seelow is connected to the Hub and is visible in the Agrimesh Console |
3. Configuring a Seelow
Once you see the light flashing twice on the device, you are ready to configure the Seelow in the Agrimesh Console. Once logged in, open up the main menu at the top left and select the Seelows tab. What you will see should be similar to the image below. The dot at the top right of the Seelow should be green. If it is red, it is likely because the Seelow is turned off. Try turning it back on by pressing the button on the device.
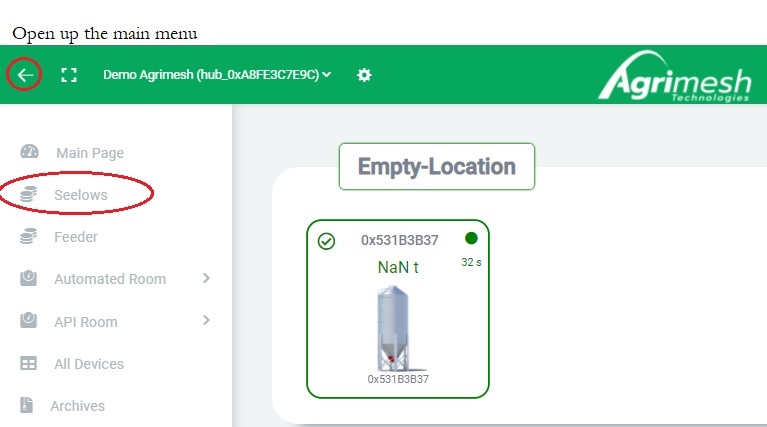
The next step is to select the Seelow to configure. This is easy enough if you have a single Seelow, but if you have more than one, make sure the serial number (0x531B3B37, image above) on the Agrimesh Console matches the one on the device.
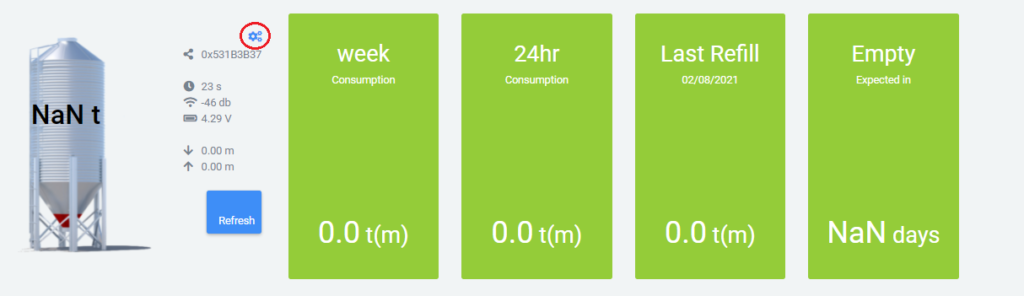
Upon clicking on the Seelow, you will access the information related to it: the weekly and the last 24 hours consumption, the date and amount of the last refill, the date the bin is expected to be empty, and much more if you scroll down. For now, in order to configure the Seelow, let’s click on the blue cog next to the green rectangles. A blueprint of a Seelow will appear (see below): this is where we will configure the Seelow.
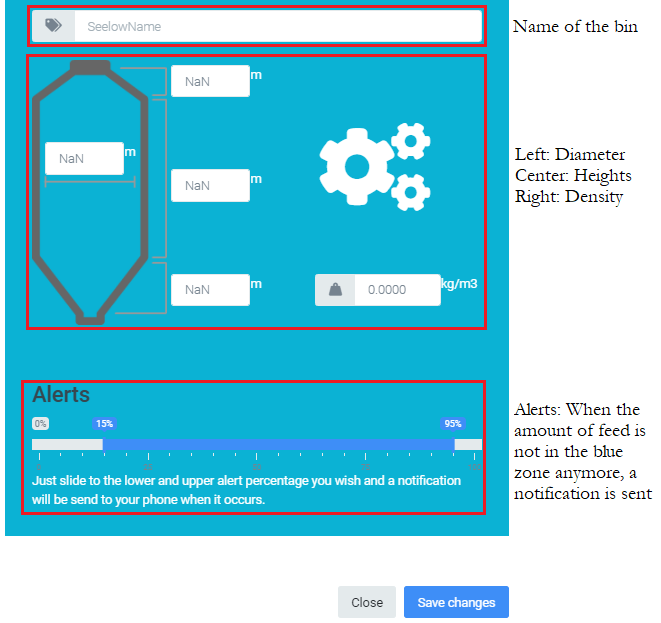
Enter the name, the dimensions and the density of the feed for this particular bin. If the density is unknown, please try contacting your feed distributor. They are best suited to know this information. Also, make sure the units on the blueprint correspond to the measurements you have. If you want to, you can change the units of measurement to fit the ones you have. The decimal seperator must be a dot. The blue alerts bar towards the bottom lets you choose when you will receive notifications regarding this bin. Once all of the information is entered, click save changes.
That’s it! The Seelow has been configured. If it wasn’t already on top of the bin, it is ready to be mounted up there. Once in place, you might want to make sure you still see the light on the Seelow flashing twice. If it is not, refer to the table at the top of this page or contact our support.