Before installing your Seelow
It is usually a good idea to configure the Seelow properly before installing it on the bin. If something goes wrong, it is then possible to contact our support and have the Seelow in hands without having to climb back up on the bin. Either way, this guide will provide all the information you need to get started with your Seelow.
If you would like to configure the Seelow before mounting it on the bin, make sure you have already created your account and added a Hub to your allowance list.
Turning on the Seelow
The first step is to turn on the Seelow by pressing and holding the button until the light on it turns on solid green. The light will then starts to flash once every five seconds, meaning it is looking for a Hub to connect to. Once it has found one, it will automatically synchronize with it and flash twice every five seconds. Although it should take less than two minutes for the Seelow to synchronize with the Hub, it will take more time if one is far away from the other.
| Light signal | Signification |
|---|---|
| Light turned off | Seelow is turned off |
| Light is solid | Seelow is booting up |
| Light flashes once every five seconds | Seelow is looking for a Hub to connect to |
| Light flashes twice every five seconds | Seelow is connected to the Hub and is visible in the Agrimesh Console |
Configuring the Seelow
Once you see the light flashing twice on the device, you are ready to configure the Seelow in the Agrimesh Console. Once logged in, open up the main menu at the top left and select the Seelows tab. What you will see should be similar to the image below. The dot at the top right of the Seelow should be green. If it is red, it is likely because the Seelow is turned off. Try turning it back on by pressing the button on the device.
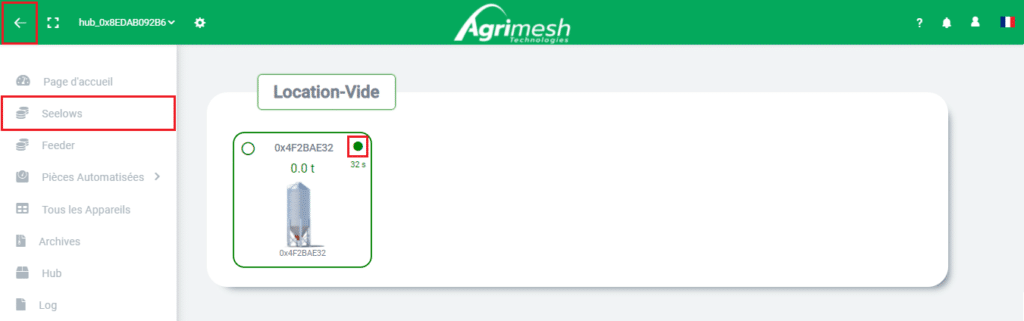
The next step is to select the Seelow to configure. This is easy enough if you have a single Seelow, but if you have more than one, make sure the serial number (0x531B3B37, image above) on the Agrimesh Console matches the one on the device.
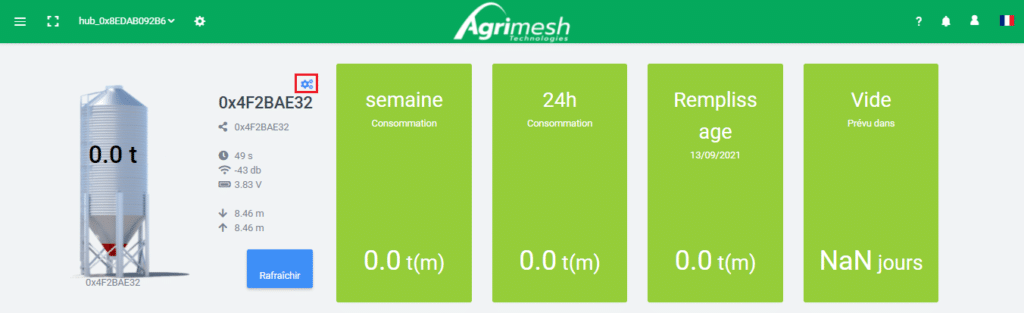
Upon clicking on the Seelow, you will access the information related to it: the weekly and the last 24 hours consumption, the date and amount of the last refill, the date the bin is expected to be empty, and much more if you scroll down. For now, in order to configure the Seelow, let’s click on the blue cog next to the green rectangles. A blueprint of a Seelow will appear (see below): this is where we will configure the Seelow.
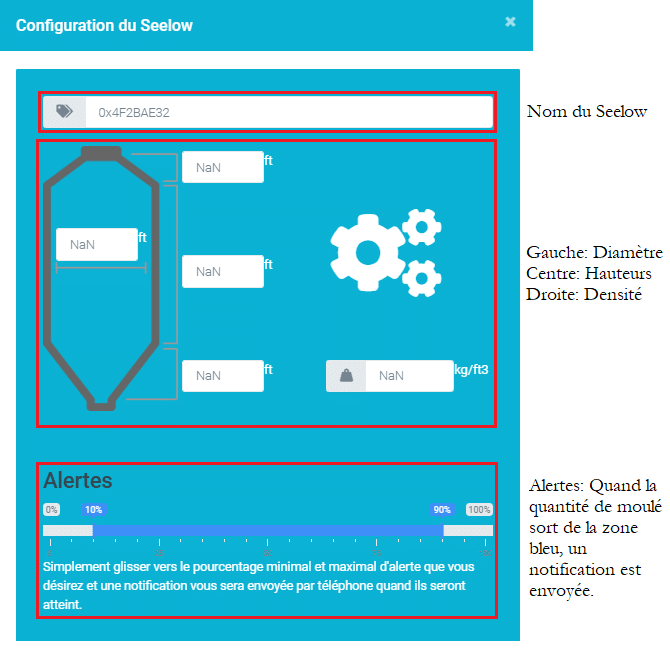
Enter the name, the dimensions and the density of the feed for this particular bin. If the density is unknown, please try contacting your feed distributor. They are best suited to know this information. Also, make sure the units on the blueprint correspond to the measurements you have. If you want to, you can change the units of measurement to fit the ones you have. The decimal seperator must be a dot. The blue alerts bar towards the bottom lets you choose when you will receive notifications regarding this bin. Once all of the information is entered, click save changes.
That’s it! The Seelow has been configured. If it wasn’t already on top of the bin, it is ready to be mounted up there. Once in place, you might want to make sure you still see the light on the Seelow flashing twice. If it is not, refer to the table at the top of this page or contact our support.
See also: